Instructions in Spirella Corsetry/Chapter 18
Chapter 18: How to Adjust, or Put the Corset on the Client
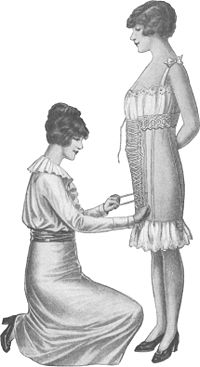
[edit]Back-laced
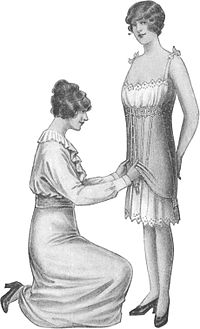
1. See that the client's poise is correct.
2. Open corset to full length of lacer and gather it up in both
hands—thumb and finger on waist line of corset.
3. Place corset around body; hold in front and pass around the
client
4. Fasten clasp-Fasten top hook to hold corset in place; fasten,
lower hooks of clasp; unfasten top hook; fasten from lowest hooks
to top.
5. Fasten hooks and eyes in soft extension.
6. Fasten supporters just below clasp to hose at inside of leg.
7. Lower corset to bring its waist line on normal waist line of
body. To do this, grasp lower front edge of corset and hold firmly,
Direct the client to take an uplifting, breath, thus maintaing nor-
mal poise and correct position of abdominal organs. See that the,
flesh over the abdomen is evenly distributed and not raised in front.
8. Lower corset well over hips in the back until its waist line
covers waist line of body in the back. To do this, grasp the lower
back edge of the corset and hold the underwear while you pull dawn
on the corset, thus lifting the flesh of back and side hips.
9. Grasp "pull-loops" at waist line; give them a firm, strong,
downward pull to maintain the position of the corset on the body
while you take up the slack in the lacer below waist line.
10. Begin at point of greatest hip development to take up slack
in lacer, pulling it up until the corset is spaced correctly below
waist. Begin at top of corset and take up slack in lacer dawn to
waist line until spaced correctly.
11. Tie "pull-loops"; fold ends and place under lacer. Space the
elastic lacer, if any, to control the flesh while the client is standing
but allow spread enough when sitting.
12. Fasten remaining supporters to maintain a straight pull on
the cloth. Adjust and tie draw-tape with client seated. Tuck ends
of draw-tape in top of corset.
Spacing in a back-laced corset must never be more than 3 inches
at top, 2 inches at waist and 3 inches at hip.
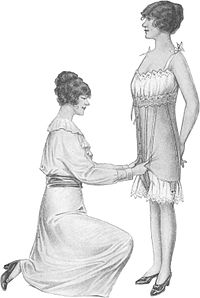
1. See that the client's poise is correct.
2. Open corset to full length of lacer and gather it up in both
hands—thumb and finger on center back seam at waist line of
corset.
3. Place corset around body, center seam over spine; hold in
front and pass around the client.
4. Fasten hooks of clasp from lowest hook to top.
5. Fasten hooks and eyes in soft extension.
6. Fasten supporters just below eyeleted strip to hose at inside
of leg.
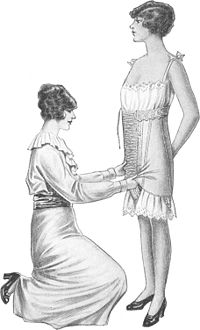
7. Lower corset to bring its waist line on true waist line of body.
To do this, clasp lower front edge of corset and hold firmly. Direct
the client to take an uplifting breath, thus maintaining normal
poise and correct position of abdominal organs. See that the flesh
over the abdomen is evenly distributed and not raised in front.
8. Lower corset well over hips in the back, until its waist line
covers waist line of body in the back. To do this, grasp the lower
back edge of the corset and hold the underwear while you pull down
on the corset, thus lifting the flesh of back and side hips.
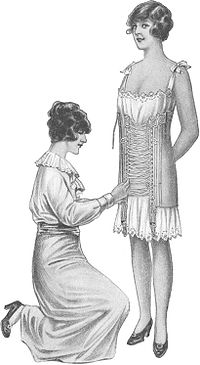
9. Grasp lacer about three eyelets, above "holding knot" and
give a strong downward pull, to maintain the position of the corset
on the body. Take up slack in lacer toward the waist line until
the corset is spaced correctly.
10. Beginning at top, take up slack in lacer down to waist line
until spaced correctly, forming a "V" shaped opening.
11. Tie "pull-loop" in a single bow knot. Open top hook, place
ends of lacer under bust and re-fasten hook. Take up slack in soft
extension to control flesh conditions; tie lacer in bow knot; tuck
ends underneath corset.
12. Fasten remaining supporters to maintain a straight pull on
the cloth. Adjust and tie draw-tape with client seated. Tuck ends
of draw-tape in top of corset.
Spacing in a front-laced corset must never be more than 1 inch at
bottom of clasp, 2 inches at waist and 2 inches at top.
Combined front and back-laced
1. See that the client's poise is correct.
2. Open the corset in front to the full length of lacer and in the
back to about 2½ inches.
3. Place the corset on the body so that the center of the lacing
space in the back is immediately over the client's spine.
4. Fasten the hooks of the clasp, the hooks and eyes of the elastic
extension and of the cloth extension. Fasten all the front hose
supporters.
5. See that the waist line of the corset is an the normal waist
line of the client all around the body.
6. Adjust the lacer in front to correct spacing. Tie and dispose
of lacer ends as usual.
7. Commence at top back and take up slack, spacing it cor-
rectly dawn to waist line. Tie lacer in hard knot at the waist,
leaving 6 or 8 inches far possible re-adjustment, and tuck ends
under lacer.
8. Grasp the "pull-loop" at heavy part of hips and give a strong,
steady pull; take up slack to correct spacing; tie in a bow knot and
tuck ends under lacer. Adjust the elastic lacer to necessary spacing.
9. Instruct the client not to change the upper back lacing, but
use the front adjustment in the daily putting on and removing the
corset. See that the client understands that the "pull-loop," in the
lacing in the lower back, is loosened before putting the corset an
again and that this "pull-loop" is drawn up and tied as the last step
in the daily adjustment.
10. Fasten the remaining hose supporters to give a straight pull
on the cloth.
Front spacing in a combined front and back-laced corset Should
never be more than 1 inch at bottom of clasp, 2 inches at waist and
2 inches at tap. Back spacing should be 1 inch the entire length of
lacing.
Combined back and partial front-laced
1. Untie and loosen the groin lacers.
2. Follow the regular steps of back-laced adjustment f rom the
1st to, the 11th step inclusive.
3. Insert the groin lacer through the eyelets and form a "pull-loop" at the point where it is desired to have the corset nip in under
the abdominal flesh. From this point carry the lacer down to the
bottom of the corset and tie in a hard knot and cut off the metal
tips.
4. Commence at the bottom of the corset and take up slack in
lacer until "pull-loop" is reached.
5. Commence at waist line and take up slack down to the "pull-
loop.
6. Tie "pull-loop" in bow knot and tuck the ends underneath the
edge so as to leave a smooth appearance over the abdomen. The
amount of space to be, left in this adjustment will vary with the
flesh condition. This lacer should be opened each time the corset is
removed. By this daily adjustment the client controls and com-
presses the flesh over the abdomen each day.
7. Fasten remaining supporters to maintain a straight pull on
the cloth. Adjust and tie draw-tape with client seated. Tuck ends
of draw-tape in top of corset.
Combined front and partial back-laced
1. Untie and loosen the back lacer.
2. Follow the regular steps of front-laced adjustment from the
1st to the 11th step inclusive.
3. Grasp "pull-loop" at heavy part of hips and give a strong,
steady pull; take up slack to correct spacing; tie in a bow knot and
tuck ends under lacer. Spacing in this partial back adjustment
should be 1 inch.
4. Fasten remaining supporters to maintain a straight pull on
the cloth. Adjust and tie draw-tape with client seated. Tuck ends
of draw-tape in top of corset.
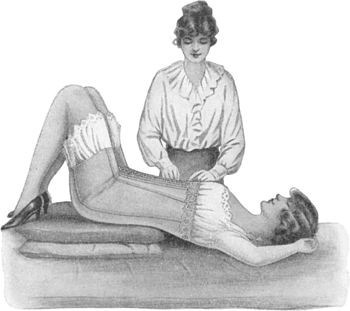
Adjustment of a front-laced corset in a reclining position
1. With client in standing position place the corset on the body
in the usual manner, following the regular steps until you are ready
to adjust the lacer. Then have client recline on a hard surface,
with hips elevated by pillows, and knees bent. Finish the adjust-
ment in the regular manner. The reclining position relaxes the
tension of the abdominal muscles and allows gravity to bring the
internal organs back to their correct position.


